PIPELINE
Within the DataTask realm, a pipeline is a sequence of jobs which can be dependant to each others.
Building a pipeline
Gitbox pipeline representation
The construction of a pipeline relies on a pipeline.json file which resides in a directory task in the set up gitbox
Pipeline.json
Here, an example of a pipeline.json
{
    "name":"userlvi",
    "original":"SparkPipeline",
    "tasks":[
        {
            "name" :"createcluster",
            "namespacetask":"etl/create_dataproc_cluster",
            "run-if-error": false
        },
        {
            "name" :"dataprocjob",
            "namespacetask":"etl/charges_dataproc",
            "dependance": ["createcluster"],
            "run-if-error": false
        },
        {
            "name" :"deletecluster",
            "namespacetask":"etl/delete_dataproc_cluster",
            "dependance": ["dataprocjob"],
            "run-if-error": true
        }
    ]
}
Description of fields :
-
name: (String) name of the pipeline
-
original: (String) name of the whole task
-
tasks: List of dicts, represents the jobs to deploy. Every dict is made of a:
-
name: String, represents the name of the job
-
namespacetask: String, represents the gitbox directory task as shown here
-
dependance: If set or present, contains a list of dependent jobs. Every single one has to be finished before the named job starts.
-
run-if-error: By default, "run-if-error" is set to false. If it is confgurer to true, the task will be launched in any case, even if the pipeline is in error.
-
Launch a pipeline (UI)
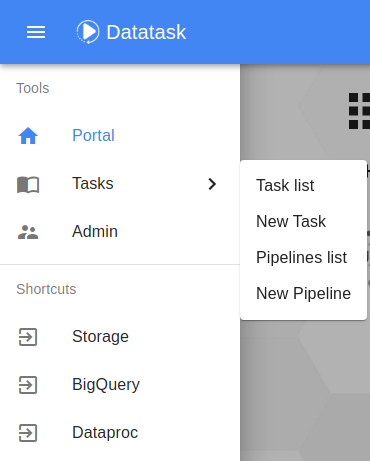
In the DataTask portal, select New pipeline
And arrive in this run pipeline page
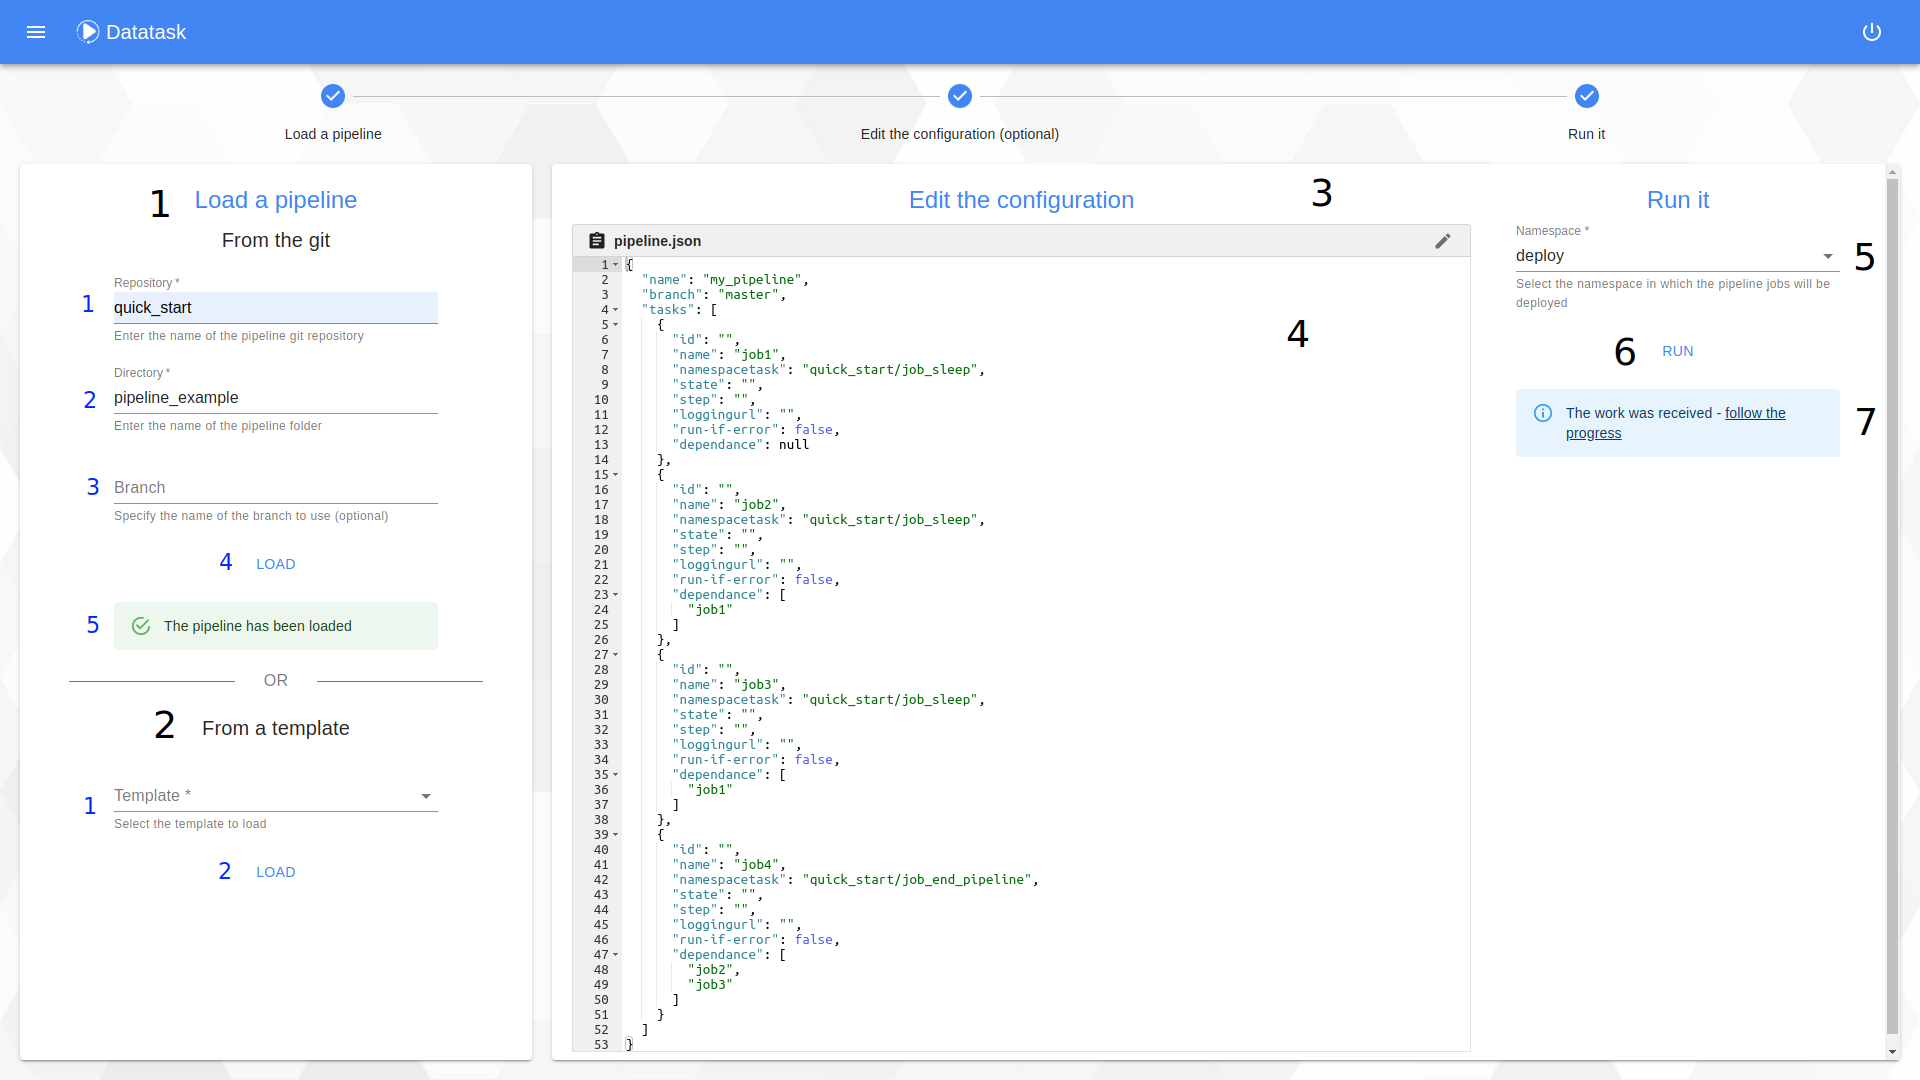
The procedure consists of 3 steps:
Step 1 : The loading of a pipeline.
In this window you have two choices :
-
Deploy your own pipeline from the "From the git" section
-
Enter the name of the git repository.
-
Enter the name of the directory containing the pipeline.json file.
-
Enter the name of the branch from which the pipeline.json should be retrieved.
-
Click on the button to start loading the pipeline.json from the git.
-
Follow the status of the loading.
-
-
Deploying a pipeline from a template using the "From a template" section
-
Select a service template.
-
Click on the button to load it.
-
Step 2 : The editing of the pipeline (optional).
On this window you have the possibility to modify the pipeline before deploying it (this is an optional step).
-
Click the edit button to unlock the window and make changes to the pipeline.
-
Edit it. To validate it press the "Apply" button. In case of an error you can cancel your modifications by using the "Restore" button.
Step 3 : Run.
This step consists in launch the pipeline defined by the pipeline.json visible on the screen on the Kubernetes cluster.
-
Select the namespace in which to deploy every tasks of the pipeline.
-
Click the button to launch it.
-
Follow the pipeline status by clicking on the link "follow the progress".
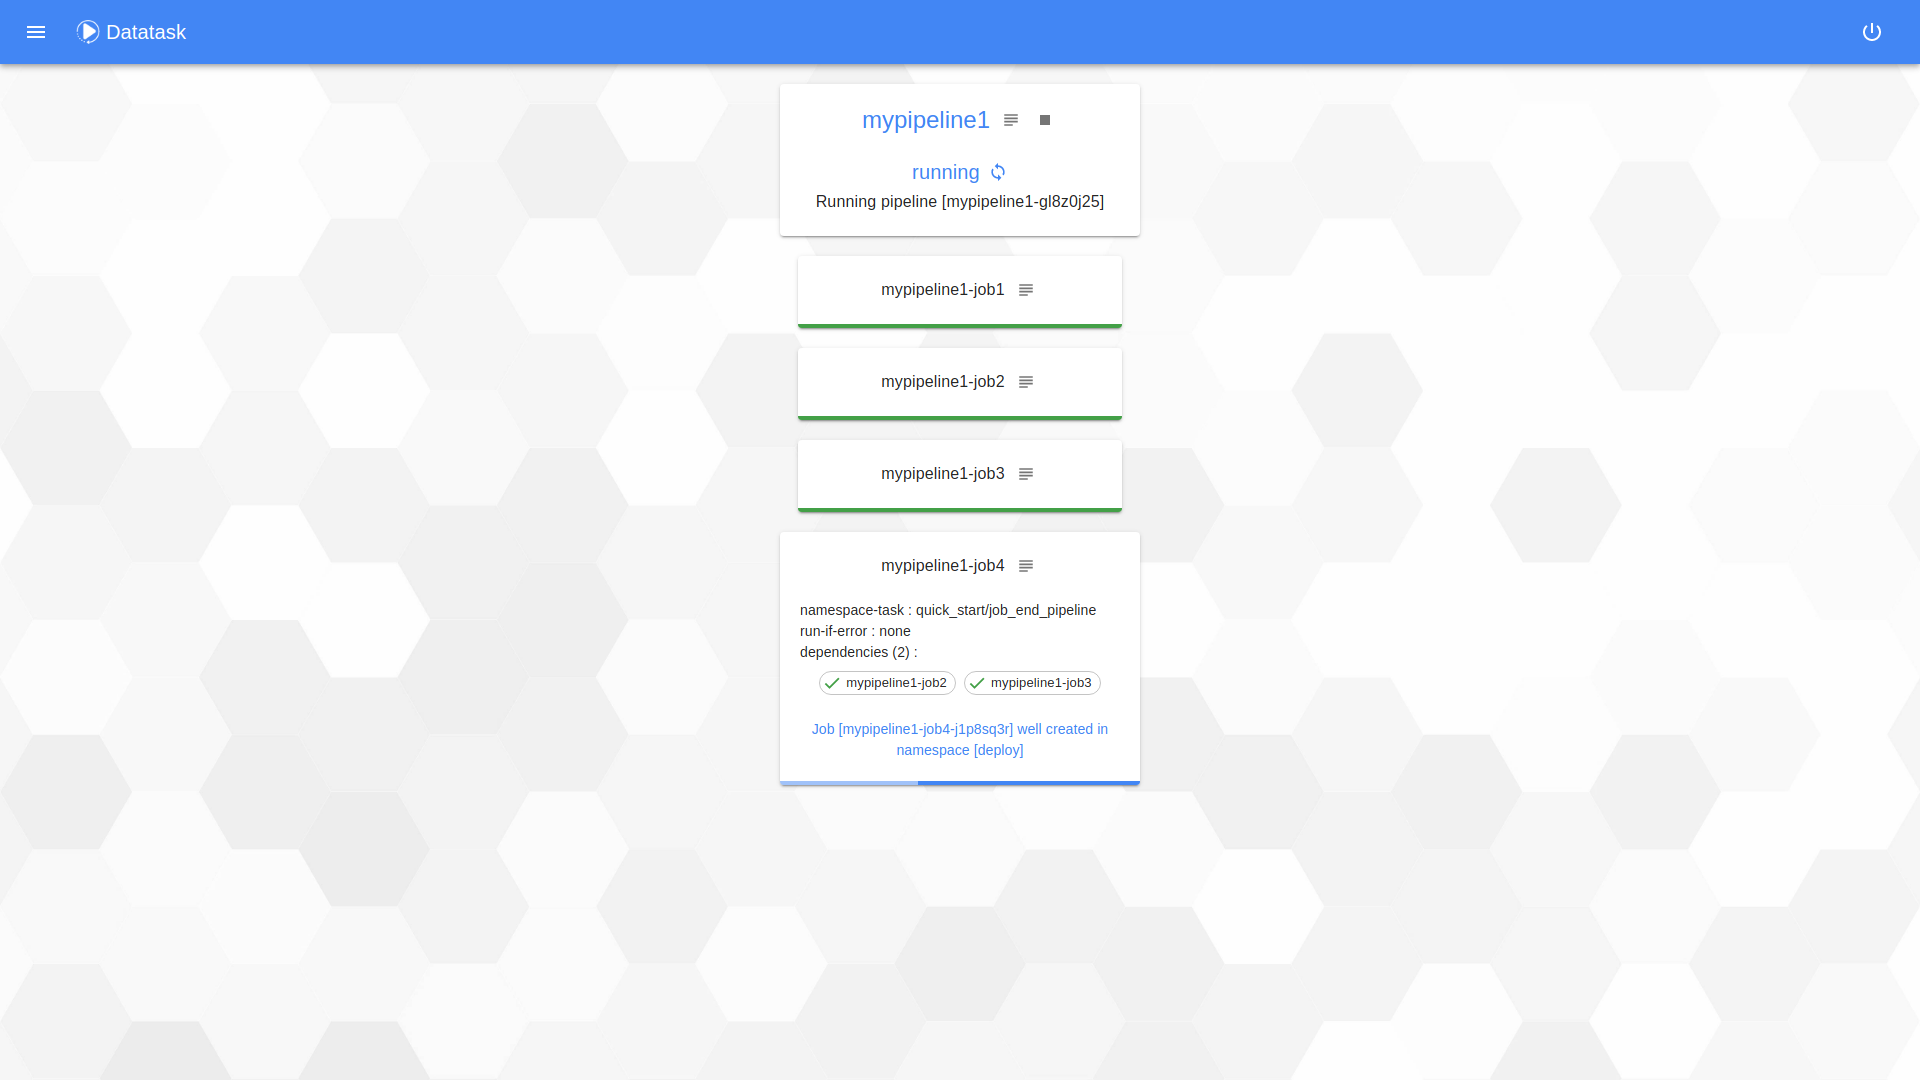
Pipeline state
On this page, you could see the status pipeline and the application logs regarding the pipeline